
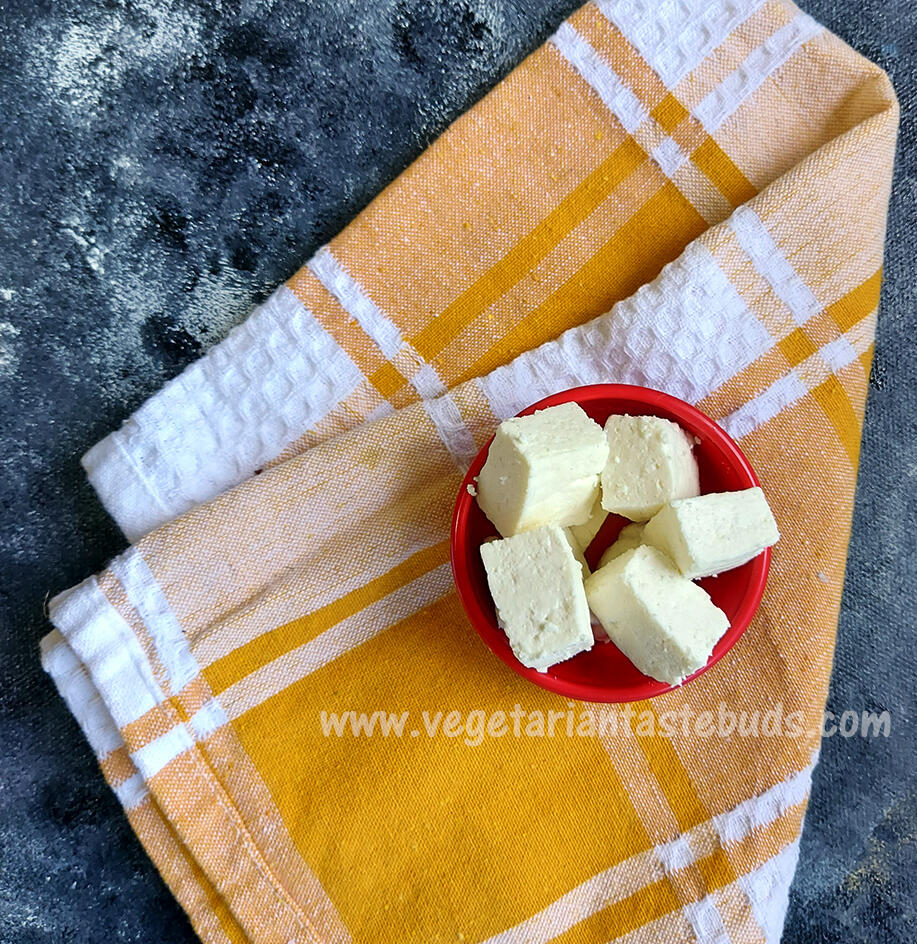
Homemade paneer recipe with step by step photos | tips to get perfect paneer cubes | how to make paneer at home
Now you make paneer easily at home with our step by step instructions. Paneer is very easy to make and nothing better than having homemade paneer. Just follow our instructions and you can get the perfect block of paneer and as a result – perfect cubes. We have curdled milk with lemon juice.
Points to keep in mind for getting perfect paneer cubes –
- The proportion/quantity of lemon juice will depend on the quality of milk you are using. The trick here is to gradually add little lemon juice and then keep a watch, and keep adding slowly till you notice the milk has curdled.
- Also, when the milk starts curdling, do not stir it too much. Just gently mix or rotate the kadai/vessel containing milk. Doing this (not stirring too much) will ensure that you get a perfect block and perfect cubes of paneer.
- Once you notice that the milk has started to curdle and whey is separating from it, stop adding lemon juice and switch off the flame. Wait for 5-10 minutes so that the milk curdles completely. This may even take longer, wait till you get a clear whey. If you feel even after waiting for 5-10 mins, there is no progress and milk has stopped to curdle, you may heat the milk for 1-2 minutes on low flame.
- Do not tie and hang the paneer. Instead, shape it in the form of a square as shown in video and then place a weight on it.
- Do not keep it outside for more than 1 hour with weight on it. If you still feel after 1 hour there is slight moisture in the block of paneer, shift to refrigerator for another 15 minutes.
How to make paneer at home | Step-wise process :
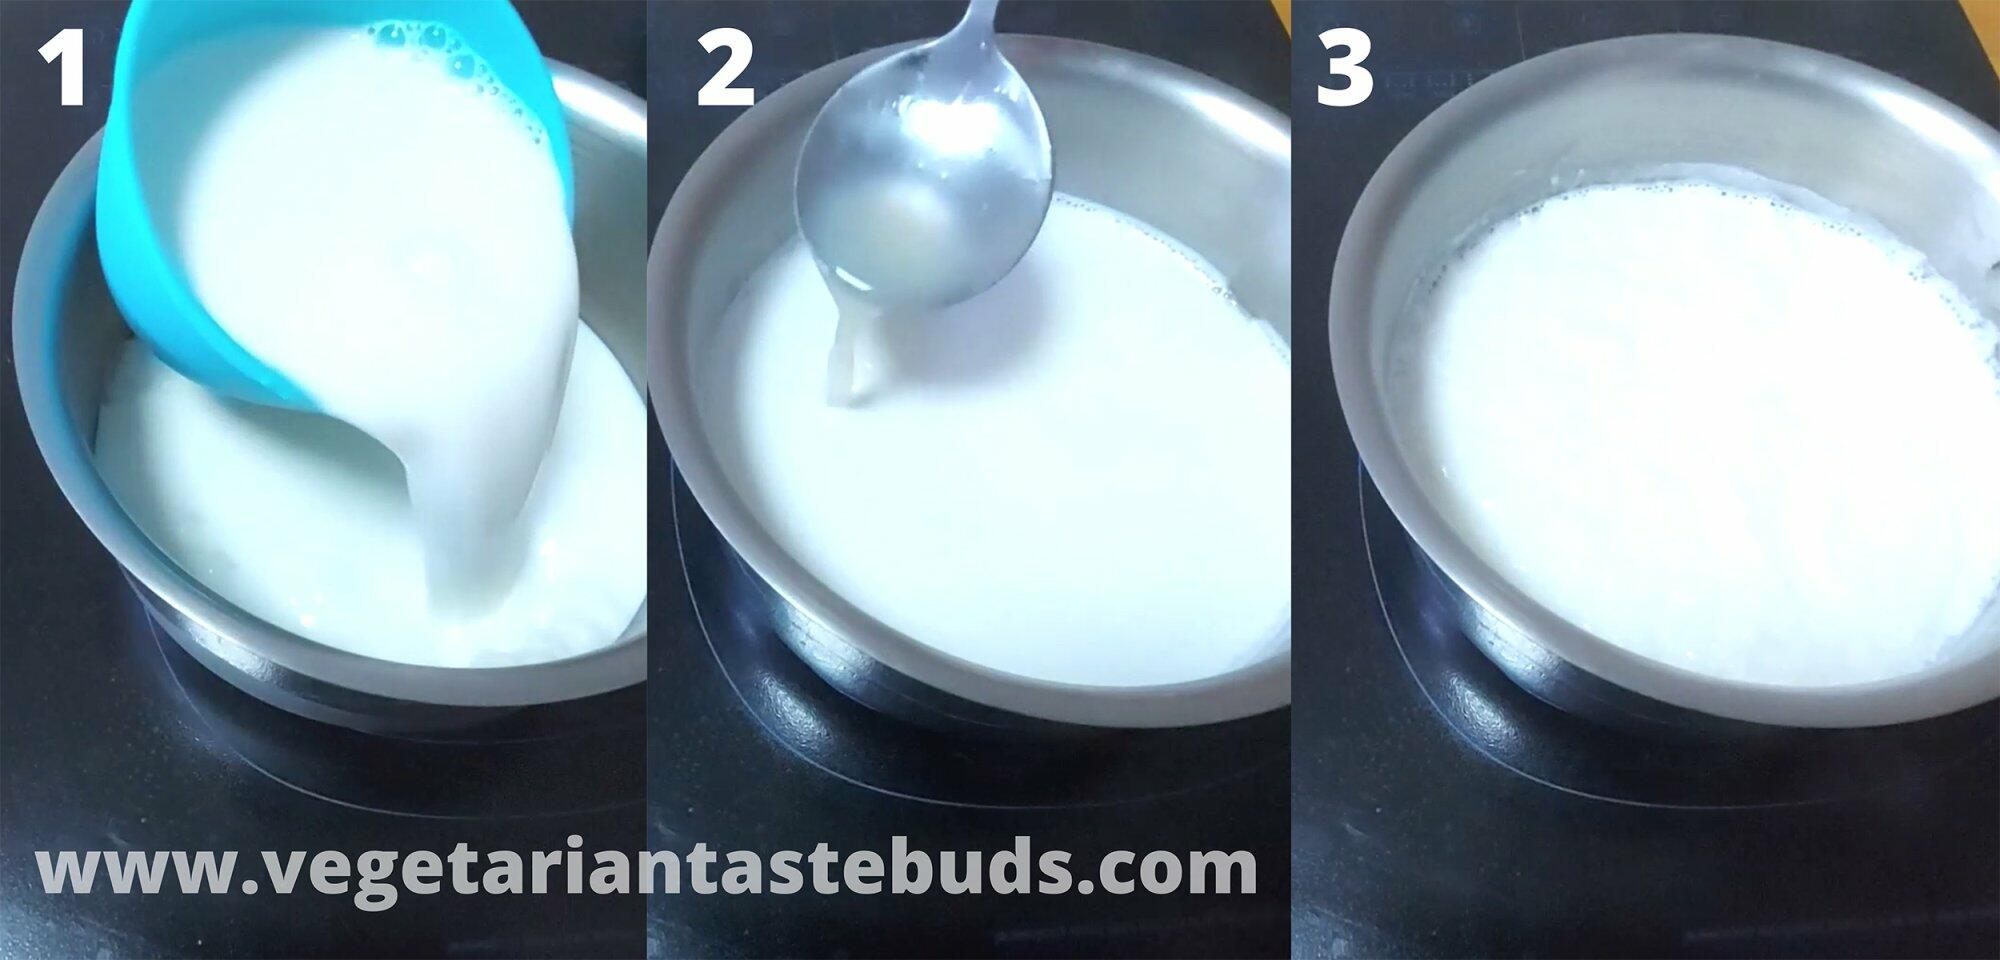
- Pour milk to a heavy bottom kadai/pan. Keep the flame on medium.
- Keep stirring and let the milk come to a boil.
- Once the milk has come to a boil, reduce the flame to low and start adding lemon juice gradually. The trick here is to gradually add little lemon juice, stir gently and then keep a watch, and keep adding slowly till you notice the milk has curdled.
- Also, when the milk starts curdling, do not stir it too much. Just gently mix or rotate the kadai/vessel containing milk. Doing this (not stirring too much) will ensure that you get a perfect block and perfect cubes of paneer.
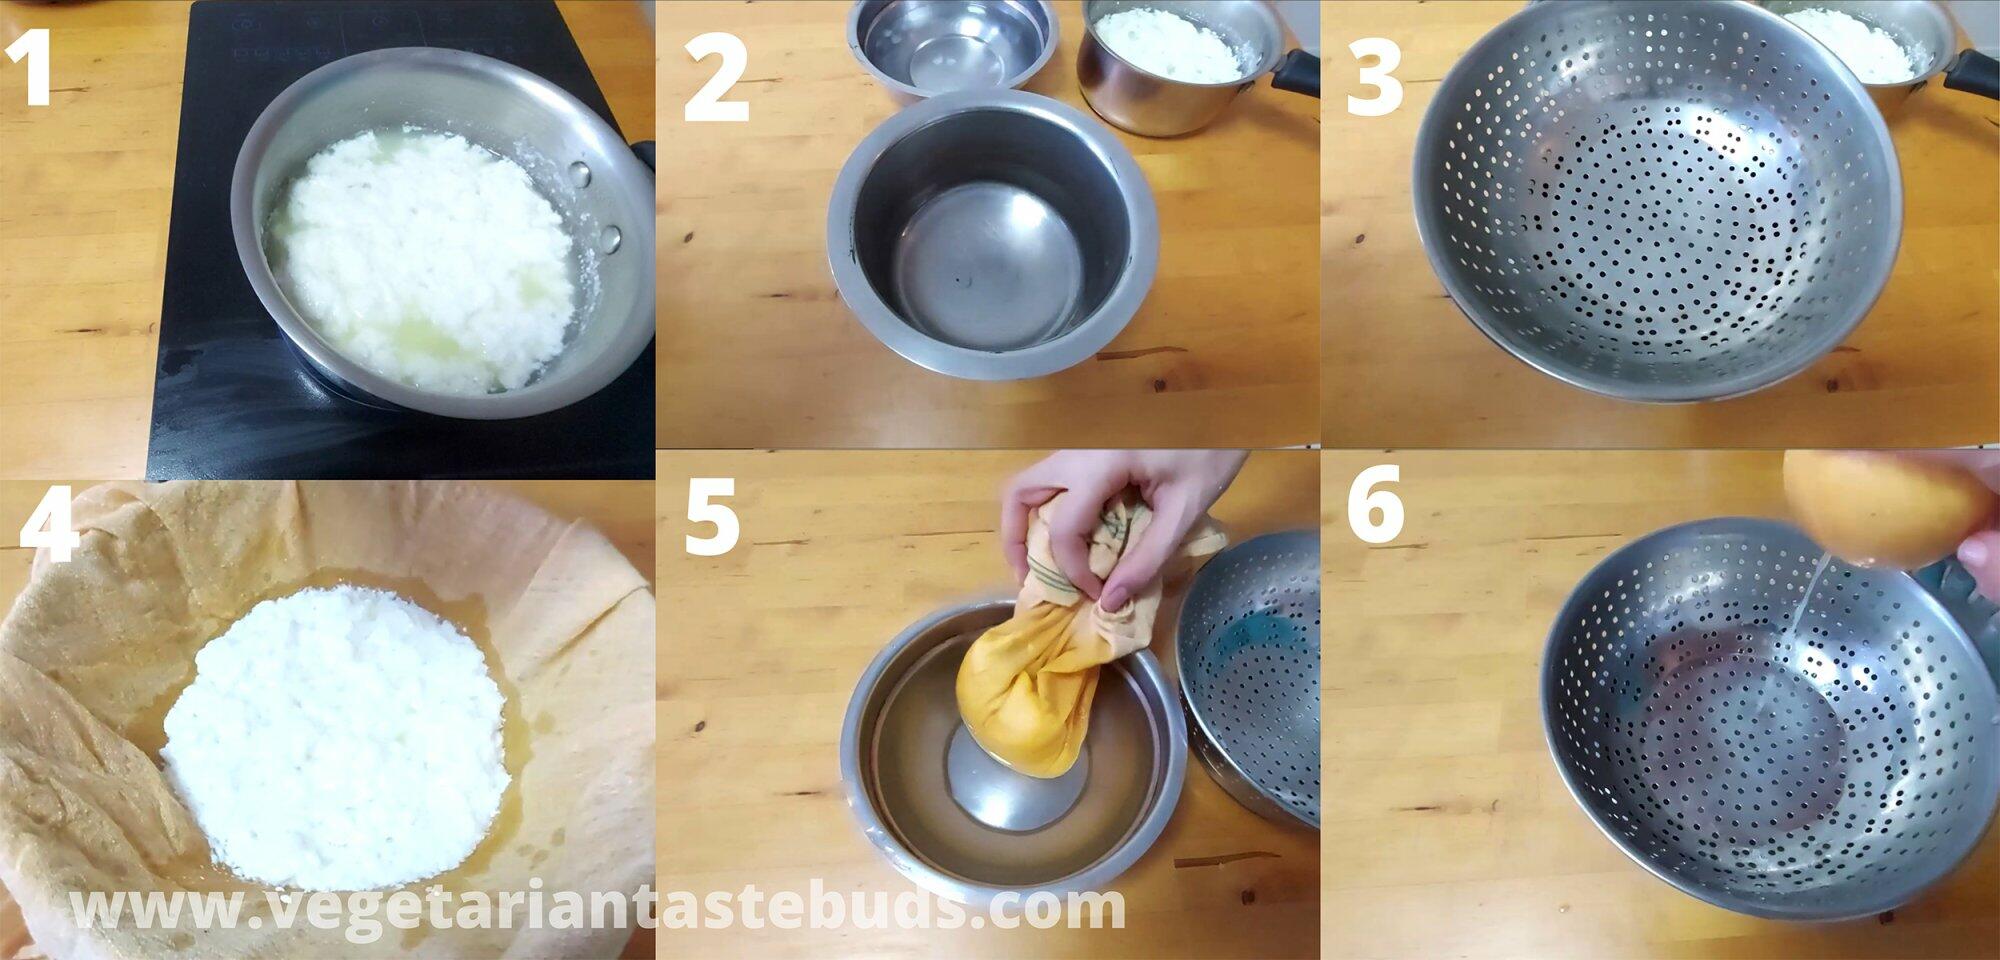
- Once you notice that the milk has started to curdle and whey is separating from it, stop adding lemon juice and switch off the flame. Wait for 5-10 minutes so that the milk curdles completely. This may even take longer, wait till you get a clear whey. If you feel even after waiting for 5-10 mins, there is no progress and milk has stopped to curdle, you may heat the milk for 1-2 minutes on low flame.
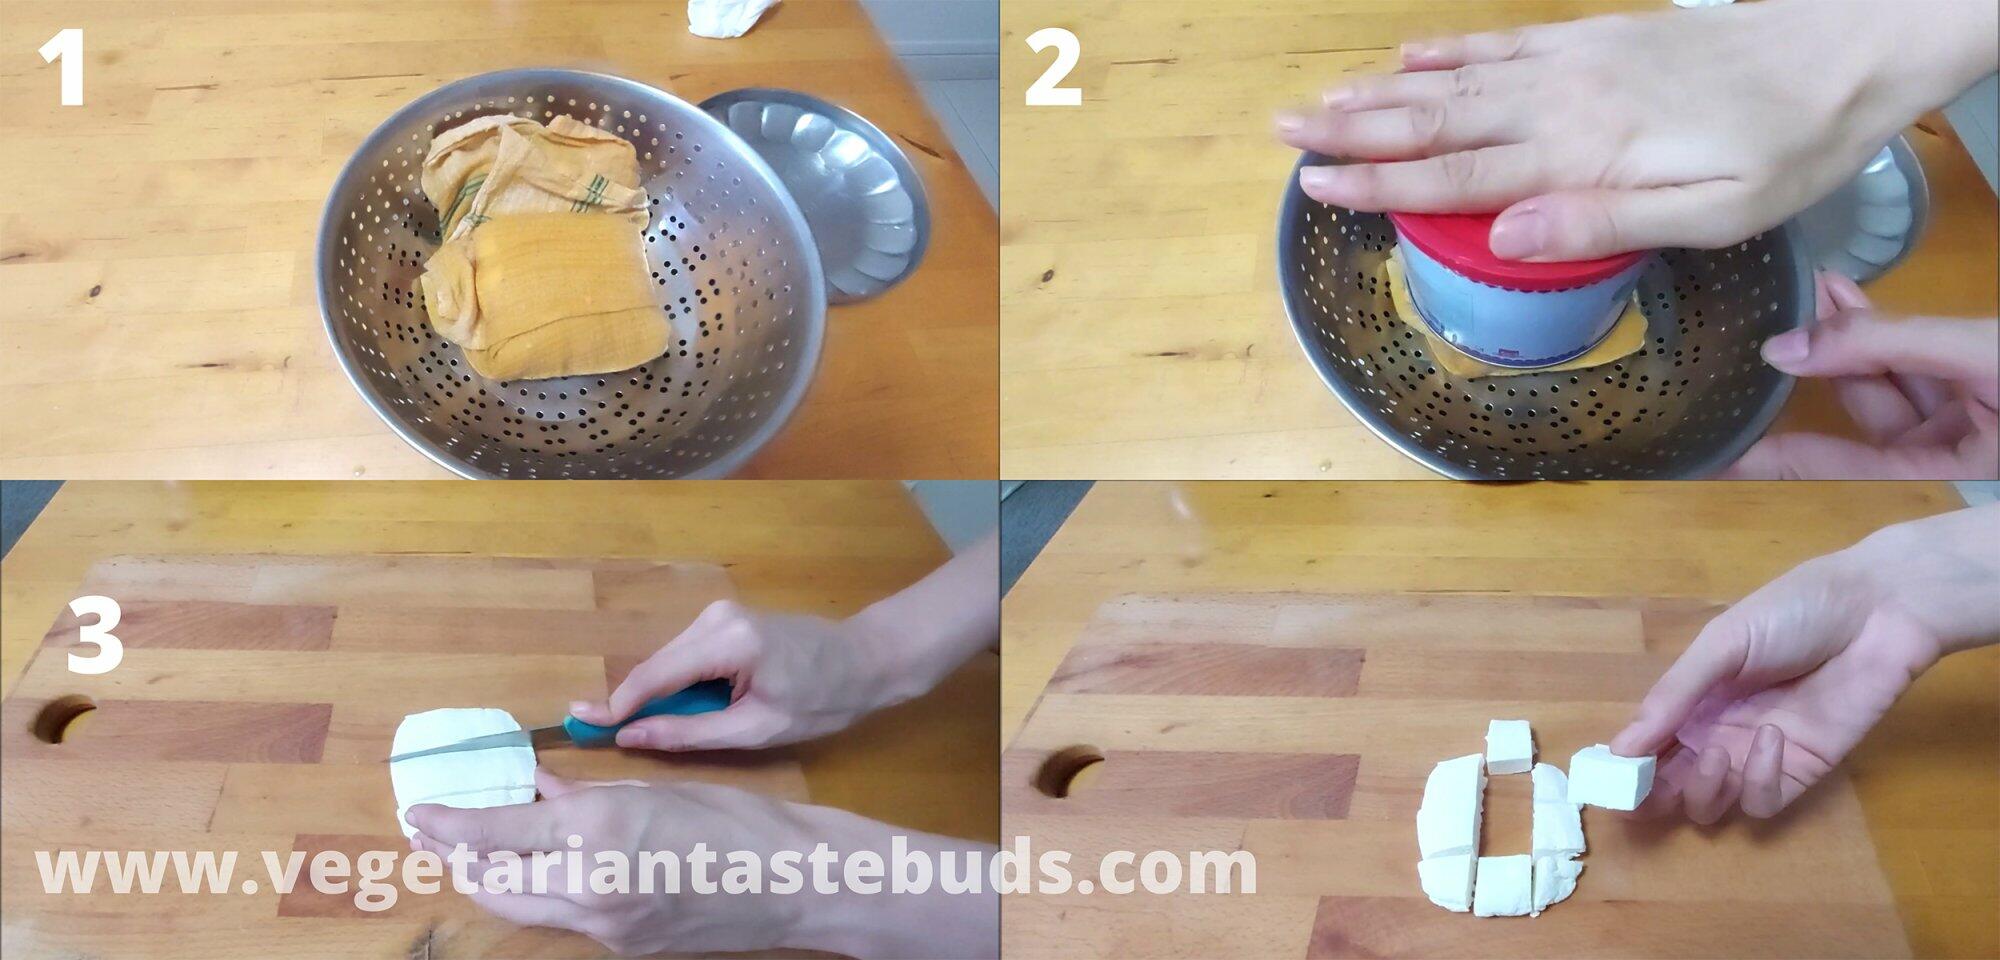
- Line a colander or large sieve with a muslin cloth. Put this over a large vessel. Transfer paneer to the muslin cloth.
- Rinse paneer under running water/dip it in a bowl of cold water. Now bring all the edges of the cloth together and squeeze to remove excess water.
- Now wrap the cloth as shown below. This will ensure to get perfect pieces.
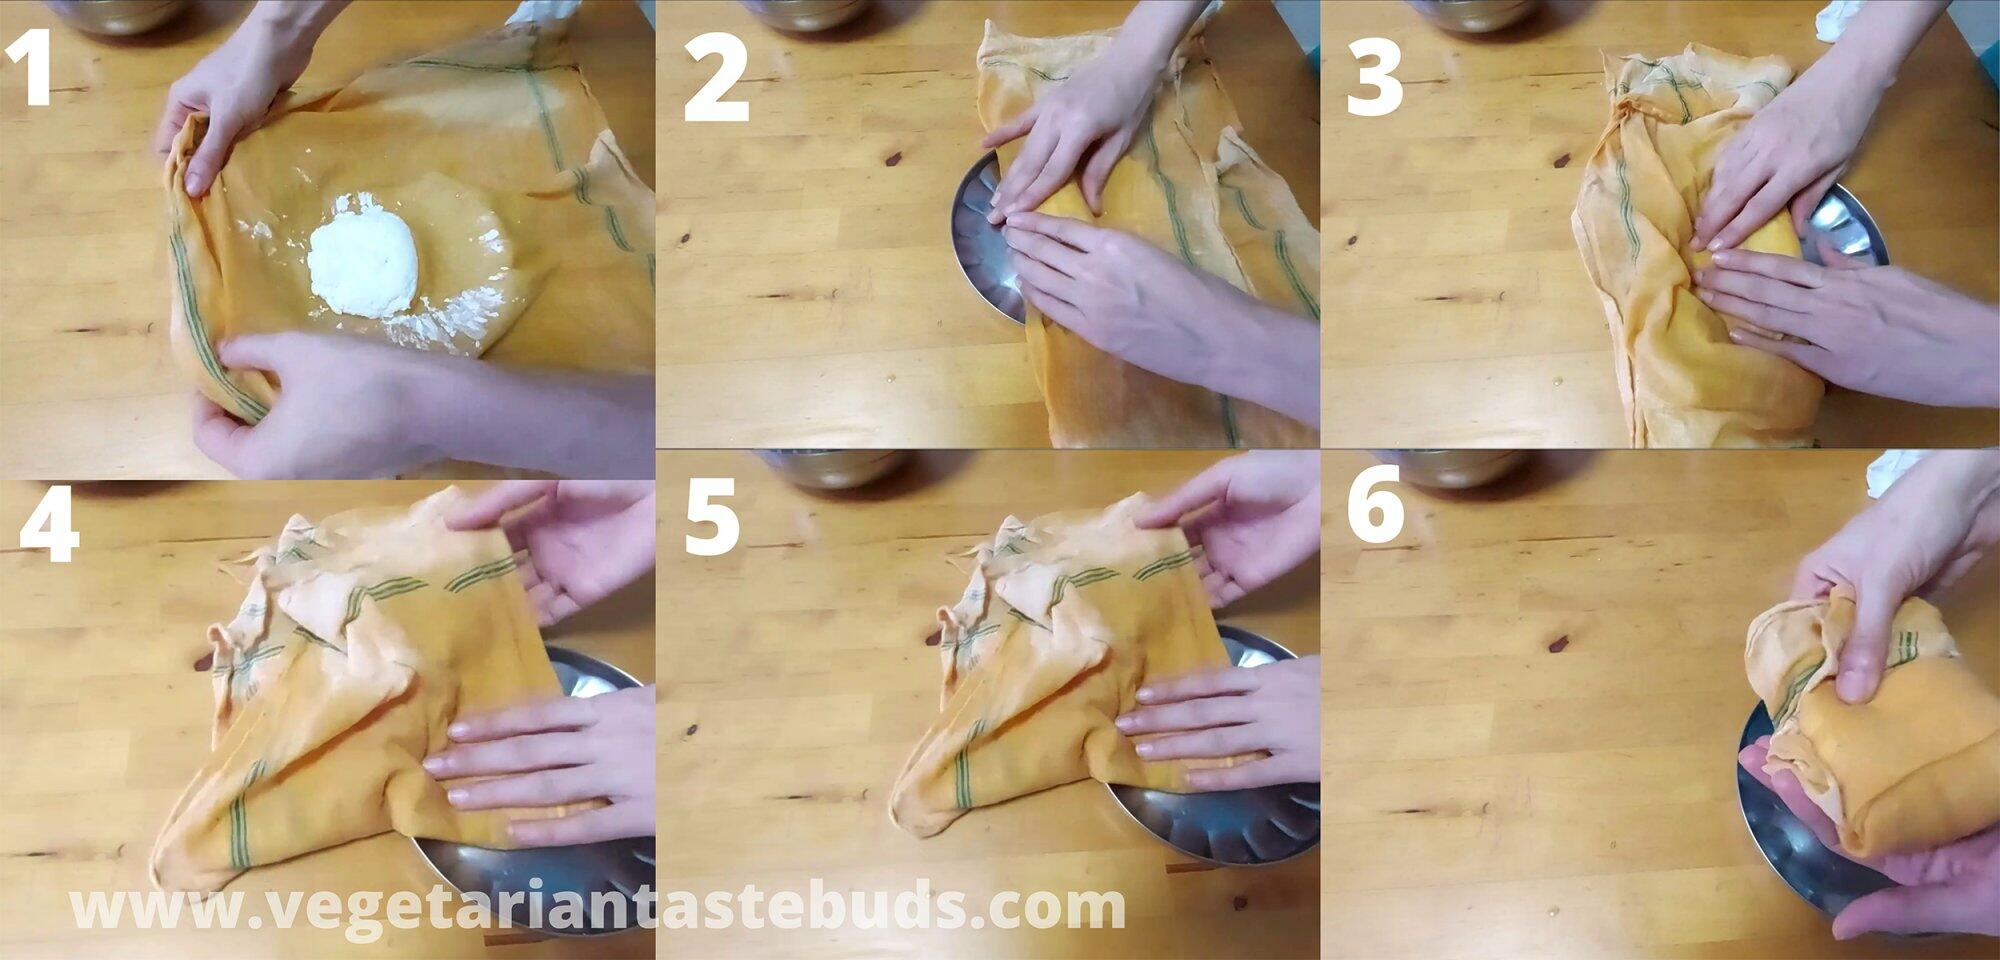
- Put some weight over it for about 30 minutes to 1 hour.
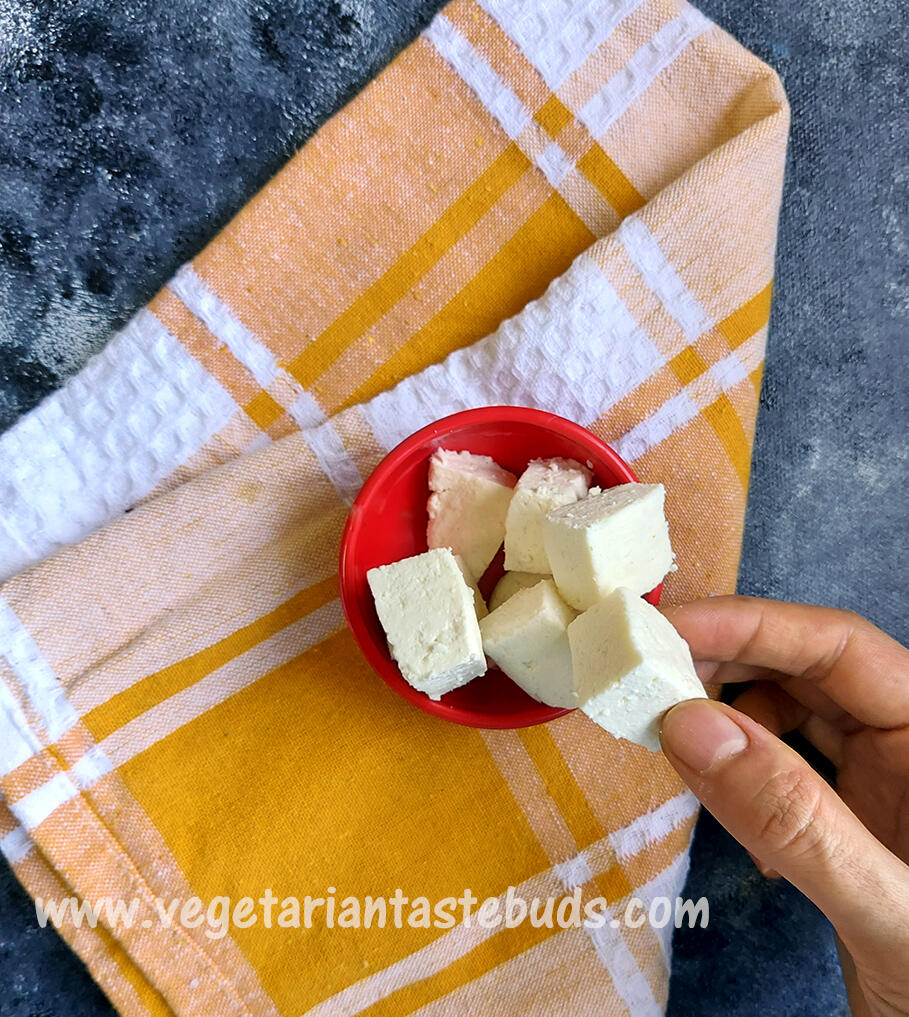
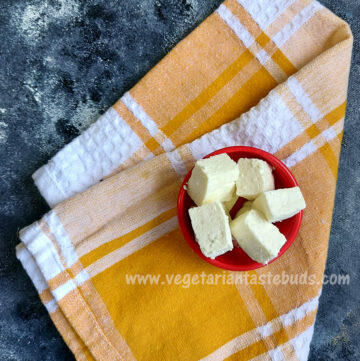
- Once the paneer is set, remove it carefully from the muslin cloth and cut into cubes. You can store paneer in an air tight container in refrigerator for 1-2 days.
More Kitchen Basics and Tips –
How to clean copper bottle
Homemade Vrat ka atta (farali flour)
Homemade Spring Roll Sheets
Chocolate Ganache
Caramel Sauce
How to make Bread Crumbs
How to make Chocolate Bouquet
Homemade paneer recipe with tips to get perfect paneer cubes | how to make paneer at home
Loved this recipe? Leave a comment below and give us a 5★ rating
Instructions
- Pour milk to a heavy bottom kadai/pan. Keep the flame on medium.
- Keep stirring and let the milk come to a boil.
- Once the milk has come to a boil, reduce the flame to low and start adding lemon juice gradually. The trick here is to gradually add little lemon juice, stir gently and then keep a watch, and keep adding slowly till you notice the milk has curdled.
- Also, when the milk starts curdling, do not stir it too much. Just gently mix or rotate the kadai/vessel containing milk. Doing this (not stirring too much) will ensure that you get a perfect block and perfect cubes of paneer.
- Once you notice that the milk has started to curdle and whey is separating from it, stop adding lemon juice and switch off the flame. Wait for 5-10 minutes so that the milk curdles completely. This may even take longer, wait till you get a clear whey. If you feel even after waiting for 5-10 mins, there is no progress and milk has stopped to curdle, you may heat the milk for 1-2 minutes on low flame.
- Line a colander or large sieve with a muslin cloth. Put this over a large vessel. Transfer paneer to the muslin cloth.
- Rinse paneer under running water/dip it in a bowl of cold water. Now bring all the edges of the cloth together and squeeze to remove excess water. Now wrap the cloth as shown below. This will ensure to get perfect pieces. Put some weight over it for about 30 minutes to 1 hour.
- Once the paneer is set, remove it carefully from the muslin cloth and cut into cubes. You can store paneer in an air tight container in refrigerator for 1-2 days.
Video

Notes
- The proportion/quantity of lemon juice will depend on the quality of milk you are using. The trick here is to gradually add little lemon juice and then keep a watch, and keep adding slowly till you notice the milk has curdled.
- Also, when the milk starts curdling, do not stir it too much. Just gently mix or rotate the kadai/vessel containing milk. Doing this (not stirring too much) will ensure that you get a perfect block and perfect cubes of paneer.
- Once you notice that the milk has started to curdle and whey is separating from it, stop adding lemon juice and switch off the flame. Wait for 5-10 minutes so that the milk curdles completely. This may even take longer, wait till you get a clear whey. If you feel even after waiting for 5-10 mins, there is no progress and milk has stopped to curdle, you may heat the milk for 1-2 minutes on low flame.
- Do not tie and hang the paneer. Instead, shape it in the form of a square as shown in video and then place a weight on it.
- Do not keep it outside for more than 1 hour with weight on it. If you still feel after 1 hour there is slight moisture in the block of paneer, shift to refrigerator for another 15 minutes.
Leave a Reply